Servomotor controlled by Gyro(MPU6050) using Arduino & Transceiver - Wir...
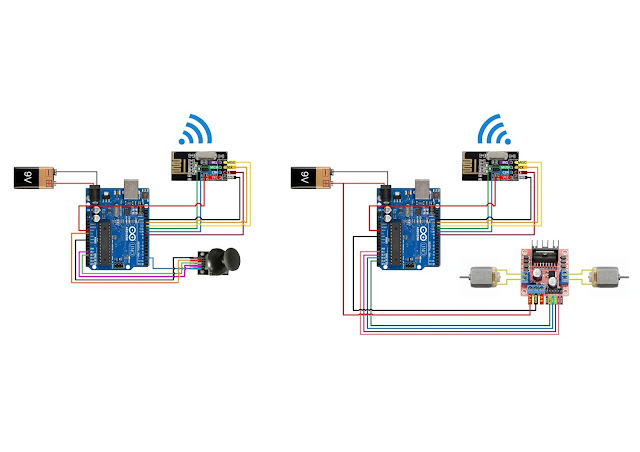
Circuit Diagram: Required Components: Arduino uno/nano - 2 Nos Battery - 2 Nos Transceiver - 2 Nos Servo Motor - 2 Nos Gyro (MPU6050) - 1 Nos Program Code: Transmitter Code: #include <SPI.h> #include "RF24.h" #include "Wire.h" #include "I2Cdev.h" #include "MPU6050.h" MPU6050 mpu; int16_t ax, ay, az; int16_t gx, gy, gz; int data[2]; RF24 radio(9,10); const uint64_t pipe = 0xE8E8F0F0E1LL; void setup(){ Wire.begin(); mpu.initialize(); Serial.begin(9600); radio.begin(); radio.openWritingPipe(pipe); } void loop(){ mpu.getMotion6(&ax, &ay, &az, &gx, &gy, &gz); data[0] = map(ax, 10, 17000, 2,178); data[1] = map(ay, 10, 17000, 2,178); radio.write(data,sizeof(data)); { Serial.println(data[0]); Serial.println(data[1]); } } Receiver Code: #include <Servo.h> #include <SPI.h> #include "RF24.h" Servo Servo_motor_x,Servo_motor_y; RF24 radi...


اذا كنت تبحث عن افضل خدمات تركيب وتصليح اجهزة الستلايت الان فيمكنك الوثوق بنا والتواصل مع فنى ستلايت السالمية الذى يوفر الكثير من الخدمات باقل التكاليف حتى تناسب الجميع بالاضافة الى رقم فنى ستلايت الفروانية الذى يتميز بسرعه الرد والاستجابة على جميع استفسارات العملاء وكذلك ارقام فنى ستلايت حولى حيث سرعه الرد والمعاملة الحسنه وايضا فنى ستلايت محافظة الجهراء من اجل تركيب ستلايت الكويت الان
ReplyDeleteBro make it with 4 motor please
ReplyDelete