Servomotor controlled by Potentiometer using Arduino & Tranceiver - Wire...
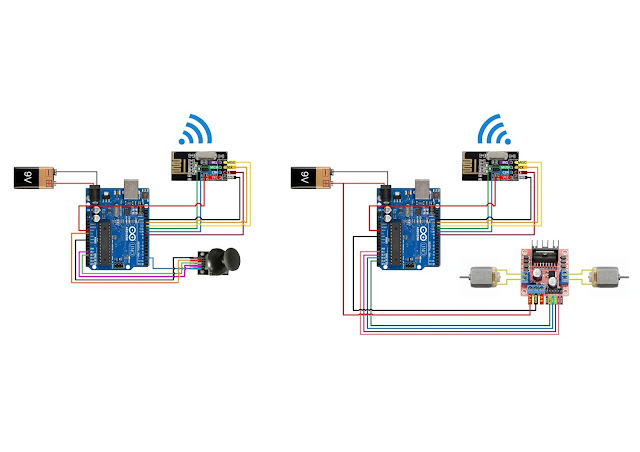
Circuit Diagram:
Required Components:
Arduino uno/nano - 2 Nos
Battery - 2 Nos
Transceiver - 2 Nos
Servo Motor - 2 Nos
Potentiometer - 2 Nos
Program Code:
Transmitter Code:
#include <SPI.h>
#include "RF24.h"
int msg[1];
RF24 radio(9,10);
const uint64_t pipe=0xE8E8F0F0E1LL;
int Potpin=A1;
int val;
void setup() {
radio.begin();
radio.openWritingPipe(pipe);
}
void loop() {
val=analogRead(Potpin);
val=map(val,0,1023,0,179);
msg[0]=val;
radio.write(msg,1);
}
Receiver Code:
#include <SPI.h>
#include "RF24.h"
#include <Servo.h>
Servo myservo;
RF24 radio(9,10);
const uint64_t pipe=0xE8E8F0F0E1LL;
int msg[1];
void setup() {
myservo.attach(5);
radio.begin();
radio.openReadingPipe(1,pipe);
radio.startListening();
}
void loop() {
if(radio.available()){
bool done = false;
while(!done)
{
done = radio.read(msg,1);
myservo.write(msg[0]);
}
}
}
Video:


Please send me the library on my email please
ReplyDeletePlease make coding for 4 servo motors please
ReplyDeleteMe to please
Delete8 servo motor please
Deleteit shows an error
ReplyDeleteerror: void value not ignored as it ought to be
done = radio.read(msg,1);
^
Multiple libraries were found for "RF24.h"
exit status 1
void value not ignored as it ought to be
problem with RF24 library
Deletedownload it here https://github.com/maniacbug/RF24
code for 10 servo. 7 potentiometers used
ReplyDelete